As a someone who works in the software industry, you should always expect sudden requests from your customers to make changes on their running projects, though these changes might be minor changes, but a complete deployment process is required, which will take some time ,and tedious if repeated frequently.
Hence the need to use CI/CD pipelines has appeared, especially for companies work on big software projects.
Here is Mohamed Alomar from GeekFeed, I will walk you through a fairly Uncomplicated tutorial to deploy React code maintained in a CodeCommit repository to a Centos7 EC2 instance using AWS code pipeline and Apache server.
目次
Before we begin this blog
Before we begin, you should have an activated AWS account if you do not please follow this link Create and activate AWS account
what is code Pipeline?
Code Pipeline is the glue that ties the next developer tools together so to be able to create a complete pipeline you need to go through these steps:
Source – in this step the place where your code will reside will be determined.
Artifacts – Code Artifact
Build – in this step the build process will be performed.
Deploy – in the step the source code will be deployed to Ec2 instance
judging from the previous definition we need to create a place in which the source code will be placed
Create a CodeCommit repository
As mentioned before codeCommit repository is the place where your Pipeline will get the source code from.
steps to create CodeCommit repository
1-Open CodeCommit console.
2-Choose AWS region where you want your repository to be.
3-choose repository name.
4-click on create button
set up a local repository
in this step you need to create local repository and connect the local repository with AWS codeCommit repository, to do that follow these steps:
1- choose Clone URL on the top right of the page, and then choose Clone SSH.
2-using your own terminal or command line, navigate to the local repository and execute the following command:
replace ssh_ifno by the repository address, that you have just created
|
1 |
git clone ssh_info |
Add your code to CodeCommit repository
After creating codeCommit repository, now it is the time to push your code into it.
to transfer files from local repository to remote repository:
1-navigate the the local repository directory.
2-run the following commands
|
1 |
git add . |
|
1 |
git commit -m "add any comments you wish" |
|
1 |
git push |
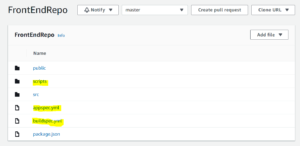
Regarding the highlighted files in yellow, it will be used in the deployment stage and in the build stage, these files will be executed each time you make any changes on CodeCommit repository.
buildspec.yml
|
1 2 3 4 5 6 7 8 9 10 11 12 13 14 15 16 17 18 19 20 21 22 |
version: 0.2 phases: pre_build: commands: - npm install build: commands: - npm run build artifacts: files: #- '**/*' #discard-paths: no #base-directory: build - public/**/* - src/**/* - package.json - appspec.yml - scripts/**/* - build/**/* |
appspec.yml
|
1 2 3 4 5 6 7 8 9 10 11 12 13 14 15 16 17 |
version: 0.0 os: linux files: - source: build destination: /var/www/html/ hooks: BeforeInstall: - location: scripts/install_dependencies timeout: 300 runas: root - location: scripts/start_server timeout: 300 runas: root ApplicationStop: - location: scripts/stop_server timeout: 300 runas: root |
Scripts files:
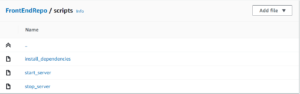
install dependencies:
|
1 2 |
#!/bin/bash sudo yum install -y httpd |
start_server
|
1 2 |
#!/bin/bash sudo systemctl start httpd |
stop_server
|
1 2 3 4 5 |
#!/bin/bash isExistApp = `pgrep httpd` if [[ -n $isExistApp ]]; then service httpd stop fi |
Create an Ec2 instance and install the CodeDeploy agent
In this step you will create Ec2 instance with Centos7 operating system, it will be used to host the source code with the help of Apache server.
Before launching an instance:
1-Open IAM console
2-Create a role with policy AmazonEC2RoleforAWSCodeDeploy
this role will be used in next steps when creating Ec2 instance, to allow Ec2 instance to use AWS CodeDeploy agent.
To launch an instance
- Open the Amazon EC2 console
- Choose Create new instance and choose Centos as operating system.
- In IAM Role choose the previously created IAM Role
- In user Data add the following:
|
1 2 3 4 5 6 7 8 |
#!/bin/bash yum -y update yum install -y ruby yum install -y aws-cli cd /home/ec2-user aws s3 cp s3://aws-codedeploy-us-east-2/latest/install . --region us-east-2 chmod +x ./install ./install auto |
the previous code is important to install apache server, to determine the region of the instance, and to install code deploy agent.
5.After configure the storage of the instance Proceed without a key pair. and click Review and launch .
Create an application in CodeDeploy
Before creating CodeDeploy application you need to create a role that allows CodeDeploy application to
- In IAM console, choose Roles, and then choose Create role.
- After navigating to IAM Role console, choose AWS service, and from the list which will appear, choose CodeDeploy.
- Choose CodeDeploy – ECS. because in our case we will deploy the code using Amazon ECS deployments.
- Click next and leave the permissions as they are.
- enter name to click create.
steps to create CodeDeploy application
- Navigate to AWS CodeDeploy console.
- Choose Create application with type Custom application.
- Add application name.
- In compute platform choose Ec2/on premises.
- Create application.
- Create deployment group.
- In Service role, choose the name of your CodeDeploy service role that you previously created.
- Choose In-place as deployment type.
- In Environment configuration, add the name of Ec2 instance that you want to deploy your code to it.
- Choose CodeDeployDefault.AllatOnce in Deployment configuration.
- In Load Balancer, clear Enable load balancing.
- Choose Create deployment group.
Create your pipeline in CodePipeline
In this step we will use the previously created components to form the complete pipeline
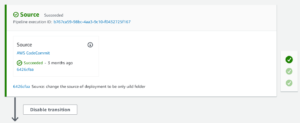
Source
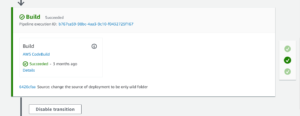
Build
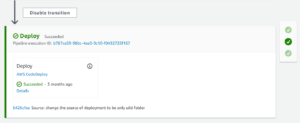
Deploy
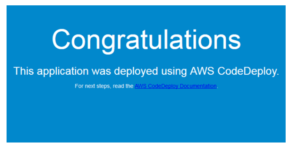
Verify if your pipeline runs successfully
By accessing the Ec2 instance public IP on port 80 we will be able to see the home page of our application
- AWS新着情報2022/3/11 - 2022-03-11
- AWS新着情報2022/3/4 - 2022-03-04
- AWS新着情報2022/1/29 - 2022-01-29
- AWS新着情報2022/1/20 - 2022-01-20
- AWS新着情報2022/1/18 - 2022-01-18
【採用情報】一緒に働く仲間を募集しています